What do all those buoys and markers mean?

Buoyage and Navigation Marks
In this blog we will be looking at ‘Buoyage and Navigation Marks’. Why are buoys at certain locations and what are they telling us? Dom covered this topic during our ‘lockdown’ Training Talks earlier this week. We are running our Free Training Talks throughout lockdown – please contact us if you would like a link to join us online. The talks are intended as refresher sessions for some and a springboard into training for others. As seen during the Training Talk, no one topic can cover everything you need to go to sea!
References:
Before we discuss colours and shapes of marks we must determine where in the world we are boating. This blog assumes we are boating in the UK. There are two systems of buoyage depending on where you are. We will be dealing with the IALA Region A system. More information if you are boating elsewhere can be found on the Trinity House Website . On their site is an interesting document about the history of the systems including permitted sizes, shapes etc.
The other document that you should start to look at if you extending your knowledge is NP5011 from the UK Hydrographic Office. Section Q deals with buoys and beacons.
Lateral Buoyage and navigation marks – “Reds and Greens”
These are basically our channel marks. They show us where the deepest water or safest route is. Bear in mind that this does not mean there will always be sufficient water for you. You must use them in conjunction with other considerations such as other traffic, byelaws, weather and tides. In many places we will have red and green marks and we will travel between the two. They will mark the sides of our channel and encourage us to stick in the middle.
Buoys are anchored to the seabed. In some places, buoys may be posts or sticks in the ground. Generally, where bigger ships go, bigger buoyage is used. As you head into less populated or shallower areas the marks will reduce in size until you finally meet withies (sticks in the ground usually made of willow).
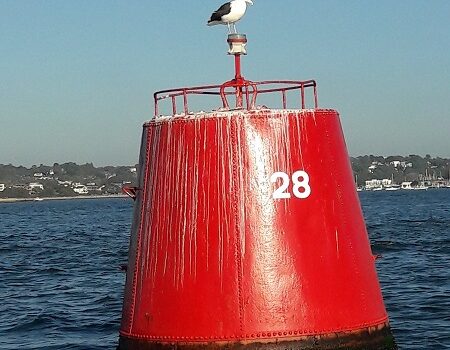
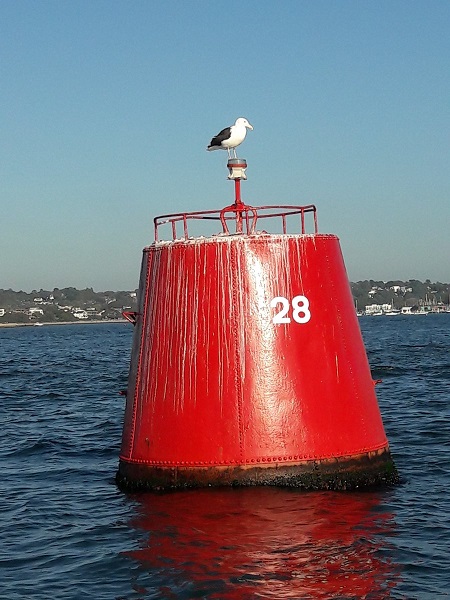
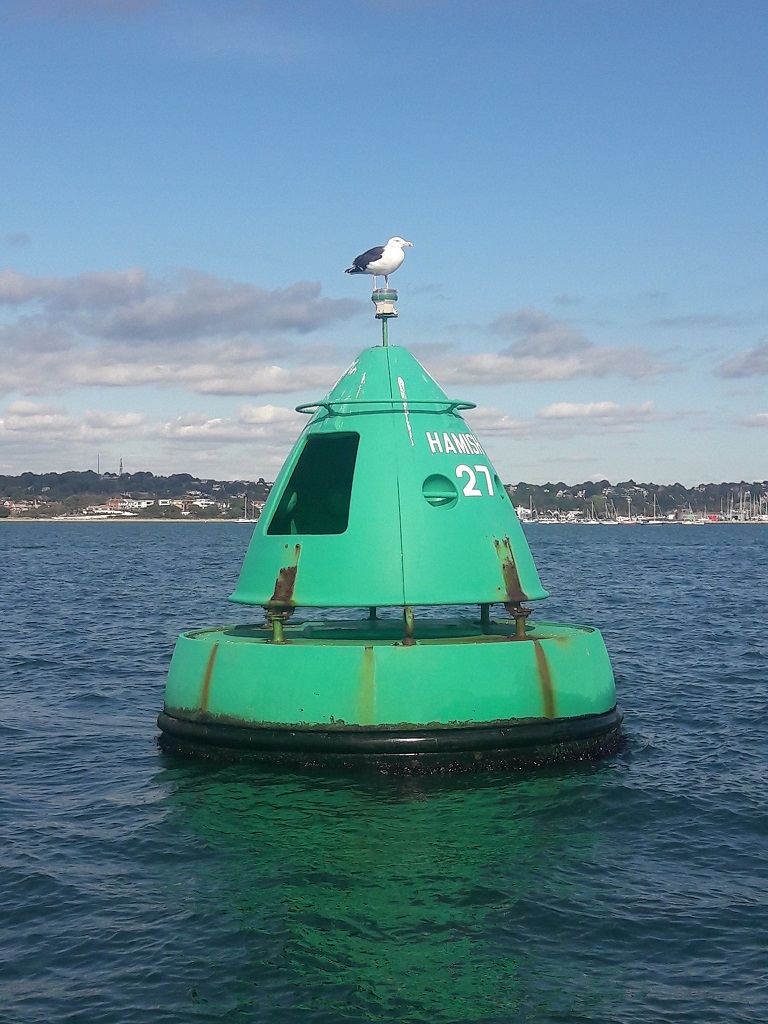
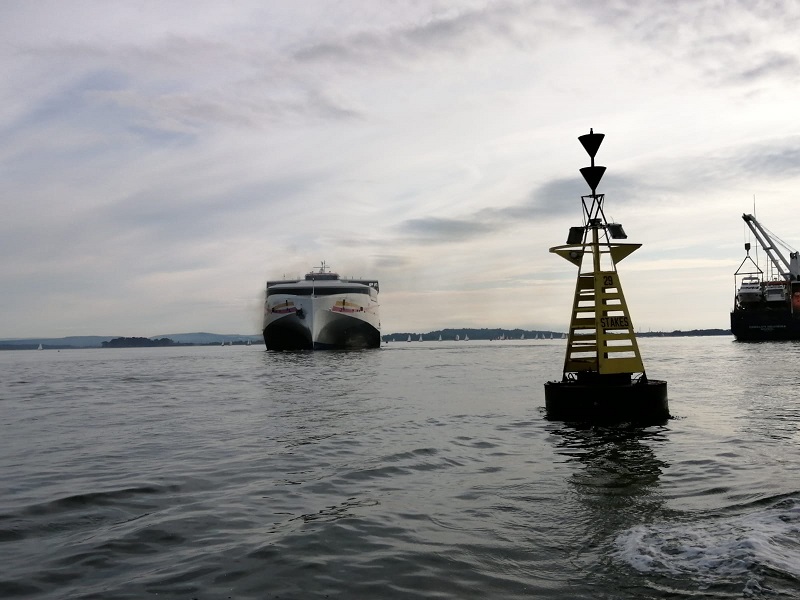
Buoyage and Navigation marks may have numbers or names upon them. If numbered, then the numbers increase as you enter the harbour so the lower the number the closer you are to open water.
Red (Port) Lateral Marks (IALA Region A area – “UK”)
I have put the term ‘Port’ in brackets as this can sometimes confuse which side we pass the mark. Port is left and associated with the colour red. On the way into a harbour we will keep the red marks to the left (port) side of our boat. Conversely, when we leave a harbour they will be on the opposite side of our boat. Its important to have this clear in your mind before heading afloat.
Port Lateral marks are cylindrical, square or ‘can’ shaped. This may be the shape of the complete mark or it may be the top part of the mark. The shapes help us to identify the mark as a Port Lateral even if the colour is distorted. Port Lateral marks have even numbers such as 22, 24, 26 and 28
Green (Starboard) Lateral Marks (IALA Region A area)
We discussed with the Port Marks that it is important to know which side to pass of the mark. On the way into a harbour we will keep these marks to the right (starboard) side of our boat.
The marks will be conical or triangular in shape. These might be the whole buoy or the top mark. If numbered then the numbers will be odd ie 3,5,7,9.
Context:
So now we have discussed channel marks we need to put the information into context. Bear in mind that just because there are markers this does not mean there will always be enough water for you and the marks might be sitting on the ground at a low tide.
If you see two marks ahead of you, red and green it is important to know whether you are heading into or out of the harbour to figure out which side you need to pass the marks. At a distance it can appear confusing.
Don’t forget to check which way you travelling. Are you going out to sea still? A good example in Poole is if you are travelling from the Quay towards Parkstone Bay or Yacht Club you are in effect heading out of the Harbour as you travel down the main channel and then North Channel. However, as you turn into the buoyed channel you are now heading into the marina and thus the buoy colour will swap. The Red Marks will be on your right hand side (starboard side of your boat) as you head down the main or North Channel. As you turn in towards the marina you are suddenly travelling into harbour and so the marks will swap sides. The red will now be on your left side, the port side of your boat. Similarly, the direction of buoyage reverses as you travel around the islands in the harbour.
Preferred Channel Marks
To the best of my knowledge, we do not have any of these currently in Poole. The closest probably being Hamble River. These marks are used where there are two potential routes we could use but there is a preferred route that is most appropriate. In the Hamble River for example there is a pontoon in the middle of the River. We could pass either side of it but the preferred channel mark shows us they would like us to take the Starboard Channel. That is the main route of the River and keeps us away from all the marinas with people manoeuvring. If however we want to go into the marina we can take the Post channel.
A Starboard Preferred Channel mark is striped, red at top, Green in middle, Red at the bottom. It is the middle colour which tells us it is Starboard preferred mark. Alternatively, the bulk of the colour is red which show it is a Port mark and we should leave Port marks to the left of us as we go into the harbour or up-river.
Conversely a Port Preferred Channel Mark is striped, green at the top, red in the middle and green at the bottom.
Cardinal Marks
These are four different marks black and yellow in colour and they follow the points of the compass. It is important to note that these show you where the safest water is. They may be buoys anchored to the seabed, or posts, or similar.
Theses buoyage and navigation marks can be used to identify :
- which side of the mark the deepest water is
- which side to pass to avoid a hazard or danger
- a feature in a channel such as a significant bend or junction
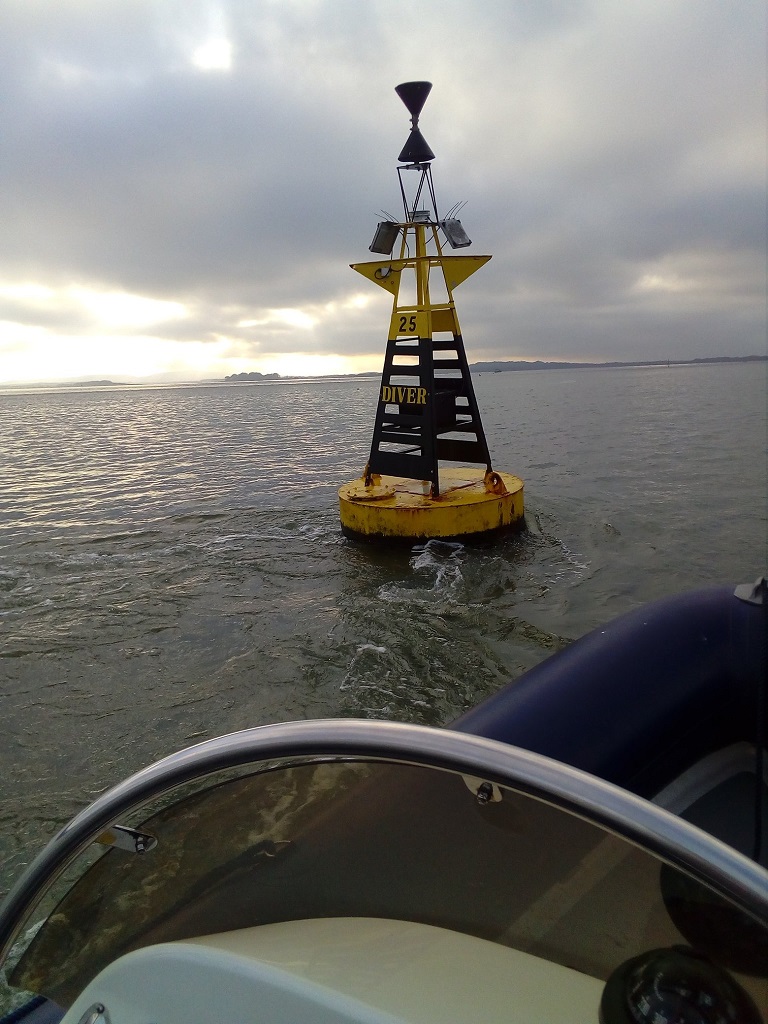
In Poole Harbour we have lots of Cardinal Marks. At our last count it was 23! (Now there is a challenge to identify them all!) Cardinals are used in Poole, where two channels meet. There also some that identify hazards or dangers particularly around the harbour entrance.
We have North, South, East and West Cardinals. We can identify them by looking at either the colours or the top marks. Each one tells you where the safest water is. So for example, a North Cardinal indicates that the safest water is to the North. You should pass the North side of the mark.
Top marks:
- North – the arrows or triangles put upwards as if to North on a compass
- South – the arrows or triangles point downwards as if to South on a compass
- East – the arrows or triangles point outwards and form a sort of egg shape. E for East, E for Egg
- West – the arrows or triangles point inwards, towards each other. Sometimes described as pinching in at the middle like a waist, forming a wine glass or if you trace the outline it forms a sideways W.
Have a think about the best way for you personally to identify them. It is really important that you don’t get them muddled up. Otherwise, you will end up in the exact opposite place and potentially in danger!
Colours:
Now if the top marks are missing or hidden by the background as in the picture below we can identify them via the pattern of colours. They are all yellow and black but each forms a separate pattern. You will notice that the triangles point to where the black would be on the mark.
- North – the black is at the top, yellow at the bottom. The arrows point to the top which is black.
- South – the black is at the bottom, yellow at the top. The arrows point to the bottom which is black.
- East – the arrows point out. Three colour bands make up the buoy. Black at the top and bottom with yellow in the middle. The arrows on the triangles point to the black. Earlier we used the analogy of an egg shape for the top mark. Similarly, if you think of a yellow yolk this is in the middle. A course attendee thought of this, what a great idea!
- West – the arrows point inwards. The mark is in three segments with the black colour in the middle.
Which side are we:
So now we know which side we need to pass we need to figure out how we know on a boat where North, South, East or West is. At this stage you will start to understand just how important it is to have a compass onboard. On many boats you will have a steering compass but even on smaller boats you can carry a hand bearing compass. It is important you understand how these work before going afloat.
Both types of compass are something we use on every RYA Powerboat Level 2 course we run. We will stop the boat and use the compass to figure out which side of a Cardinal Mark we should pass. During our Training Talk, Dom used a model boat, compass and chart to illustrate how they can be used. You can practice using a hand-bearing compass even on land if you are not able to get to your boat at the moment, That way you will be familiar and instinctive with use. We both use the Plastimo Iris 50 hand-bearing compasses.
It is possible although unlikely that you will see all four Cardinal Marks used. I have seen all four used in Sydney Harbour and Chichester Harbour.
Isolated Danger Mark
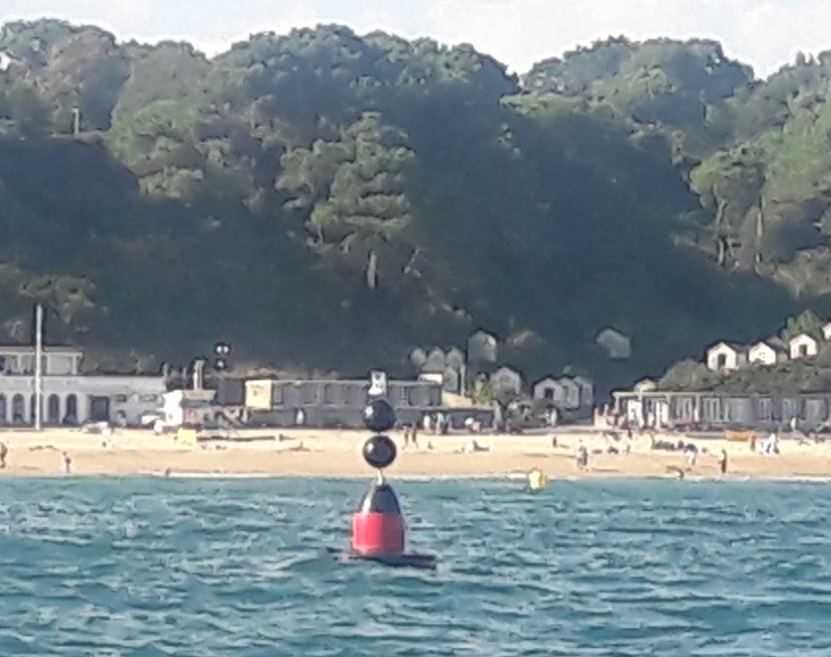
This mark is red and black horizontal stripes in colour, with two balls (spheres) on the top of it. Many associate this with the cartoon character Dennis the Menace, for whom trouble always followed. Therefore, we must stay away from this mark to avoid trouble. Some might call it a ‘balls up’.
The isolated danger mark is used in places in which there is a hazard to avoid, the surrounding water is comparatively safe. In Poole, I am aware of two although I noticed on a recent chart a new one has appeared. As yet, we haven’t seen it on the water. Locally, Christchurch always used to have a significant mark upon entering the harbour.
It will often indicate something such as rocks which may not be visible above the water. Although we could potentially travel around it, we must consult the chart to establish what the hazard is and what distance we should keep from it. I would certainly not want to be travelling all the way round the one in Poole Harbour or I would run aground – I might make it in a canoe!
An isolated danger buoy, that is anchored to the seabed, will move with the tide. In a strong tide it may not be directly on top of the hazard. With a post it is likely to be on top of the hazard but we still do not know how big the hazard is. It may or may not be obvious from the water.
At the beginning of this blog we mentioned the importance of incorporating the information about buoyage with other topics. You can see how important it is to have a grasp of chartwork to understand the significance of the mark. RYA Courses such as the Essential Navigation & Seamanship contain a great introduction to all the topics and bring all the information together to get you started on the water.
Temporary Wreck Markers
You won’t see these appear on a chart as they are used temporarily whilst the decision is made over a sunken boat. They are yellow and blue vertical stripes with a perpendicular yellow cross on top. Typically, the buoys are used for the first 24-72 hours. After which the boat may be recovered, or perhaps an isolated danger mark used.
When I initially trained, I was told the only time I was likely to see one was on the Trinity House ship being transported. I have however seen these used even locally. A couple of years ago a buoy was deployed in Christchurch Bay to mark a yacht which had sunk. You could just about make out the rigging but it was in otherwise open water. The best known use of this buoy was when the Hoegh Osaka ship grounded in Southampton Water, to prevent it sinking. The ship was definitely more noticeable than the marker!
Be aware that in local waters more local variations might be used. In Poole I have seen yellow traffic cones with the words “Wreck”!
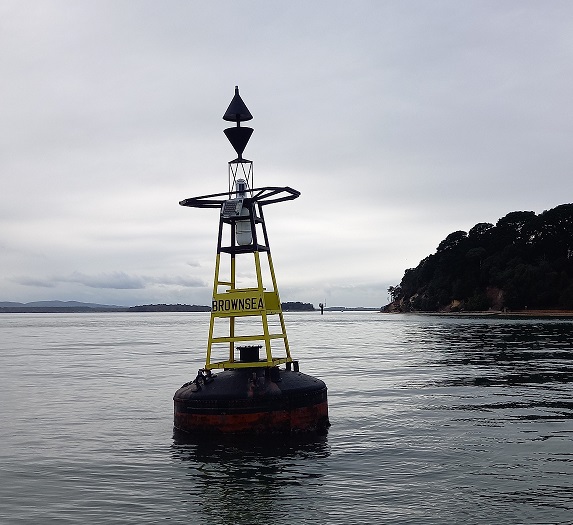
Safe Water Marks (sometimes referred to as Fairway Buoys)
The Safe Water Mark is a red and white vertical striped spherical shaped mark. These are not used to highlight a hazard but instead safe navigable water all around. They can be used in a variety of locations to indicate safe water but most often known for their Fairway Buoy context.
A Fairway mark is used at the beginning of navigation into a harbour or waterway. It is the first mark you will see from open water before entering a channel and other buoyage. Not every harbour will use them.
Poole harbour’s Buoyage and Navigation Marks used to include a ‘Safe Water Mark’. The Buoy is now decorative feature on the Holes Bay Roundabout! The most local to us is probably the Needles Fairway Buoy which marks the Western entrance to the Solent.
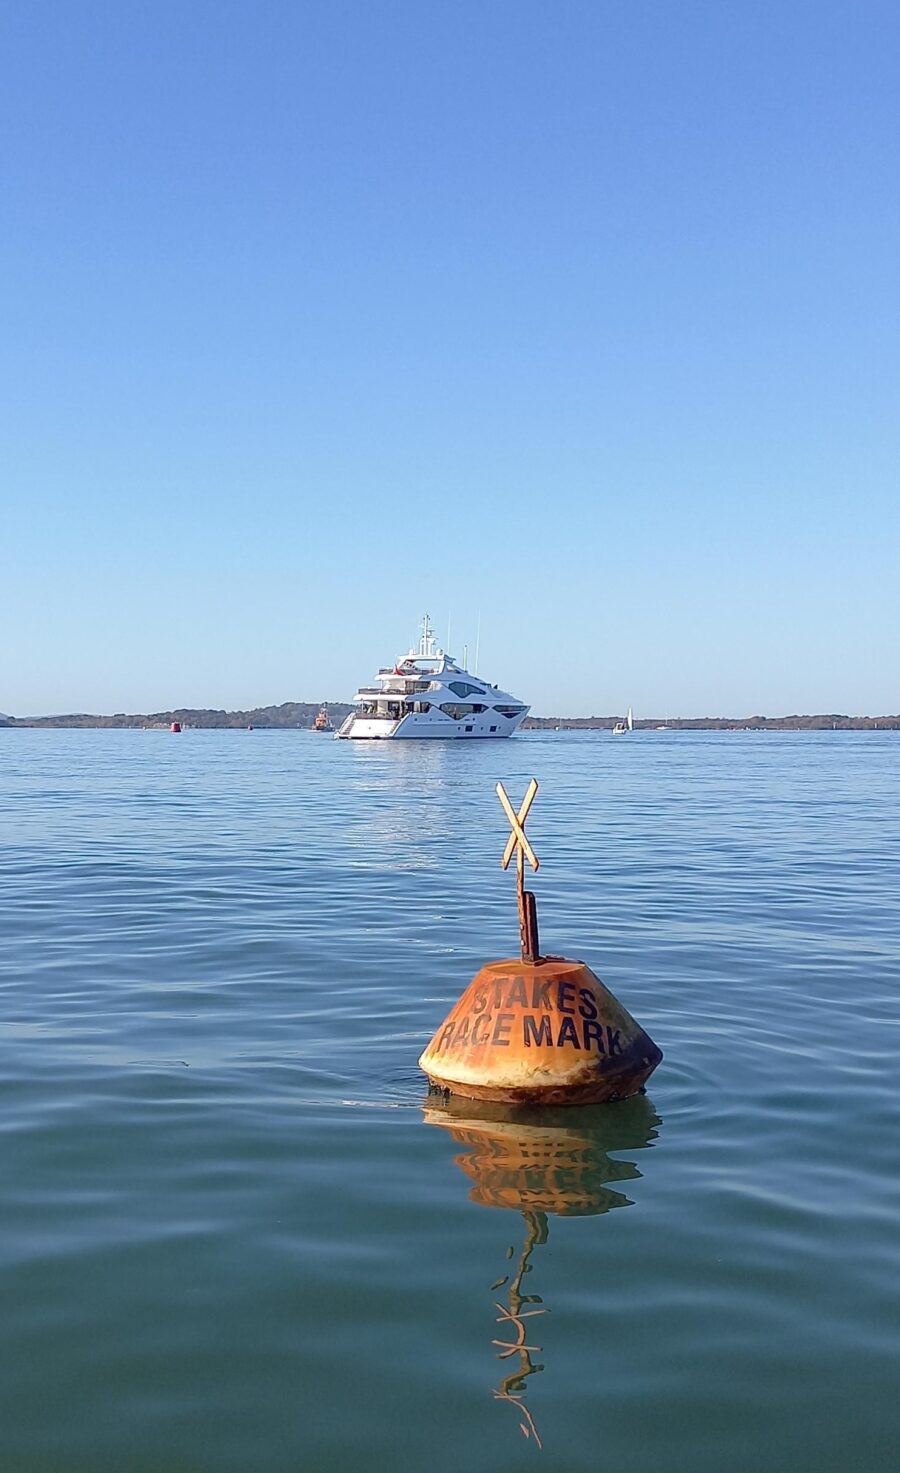
Special Marks
Special marks indicate key features or geography. They should be yellow and may have a cross/x as a top mark. Often, they will include working or pictorial representations to inform you of their message. They are giving you information about an area. There is no specific shape but they must not be able to be confused with the shape of other marks.
Special marks are used extensively around Poole
Racing:
In the harbour there are lots of special marks used for dinghy and yacht racing. These often have sponsors names on such as ‘Ellis Jones’ or ‘Chris Somner’ usually representing local marine businesses. The powerboaters amongst us might think therefore that they do not need to know about these. They are however relevant as if you see a fleet of sailing boats heading towards a mark there is every chance they are suddenly going to change direction as they pass it. Here is not the place to get into a discussion about the IRPCS (“Collision Regulations”) but more of a practical point that you may need to take avoiding action.
Allocated Water-sports Area:
Also inside the harbour, special marks are used to identify areas for different water-sports. For example, the kitesurfing area, the personal watercraft area and the water ski-ing area etc. You might think that these areas are not important to your boating but they may have specific rules. If you are pootling across the Personal Watercraft area in your sailing dinghy do not be surprised when a ‘jetski’ flies past at a reasonable pace. In this particular area and under specific circumstances they are exempt from the harbour speed limit. For guidance have a look at this LNTM, PHC LNTM . The special marks often have pictures on them to help convey their message.
Swimming:
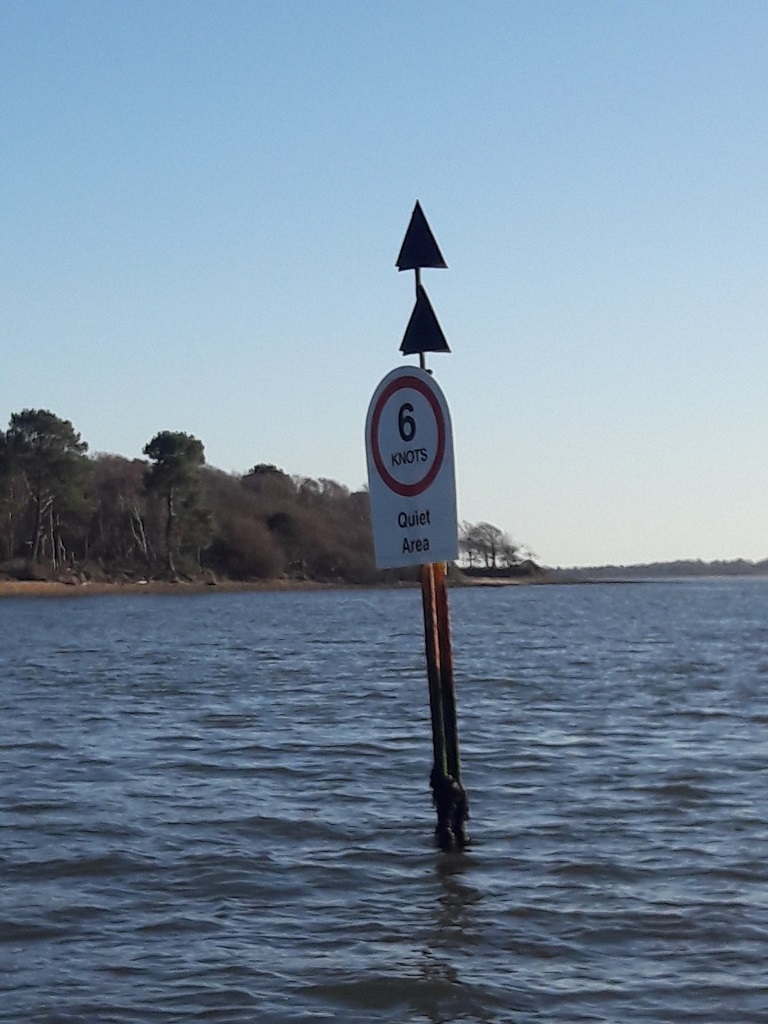
Outside the Harbour you will see special marks used to designate swimming areas, these are by the beaches and show the speed limit in Studland Bay. In the future we may see use of them to identify acceptable anchoring areas. Someone asked during our Training Talk whether these were always in shallow areas. This is not always the case, some of the special marks are used for Yachts to race around in the Bay. You may come across special marks used for weather monitoring buoys (ODAS buoys). Often recognised by their solar panels.
Cables:
Returning to the Harbour the other use you may see is the use of Special Purpose Beacons. Two special marks are used to mark a transit to identify the entrance to a marina or a turning point for a ship. At Round island, a cable runs between the island and Arne. There is yellow beacon at each end of the cable and we must not anchor there. You will also see them between Brownsea Castle and Sandbanks, and quite a number between Furzey Island and Goathorn.
Charts and Symbols
You will see from above that we cannot ascertain everything we need to know about buoyage and navigation marks from just seeing them. We must use lots of additional resources to understand the message of the mark. We have already discussed that we may need to consult NP5011 or LNTMs (Local Notices to Mariners). In addition, we will also need to consult charts, almanacs, and local harbour guides.
A look at the Key for the chart or NP5011 will show us the symbols used for different marks on the charts. These are unlikely to be in colour, instead appearing in black with the shape and top-mark and will often have the letters of the colours written underneath. For example, an isolated danger mark with have the shape and the two black spheres or ball. Underneath written BRB (Black, Red, Black). Don’t confuse the colours with the magenta teardrop used on some charts. A teardrop shows the mark is lit, at night. The colour of the light is coded by the symbol and is the topic for another blog!
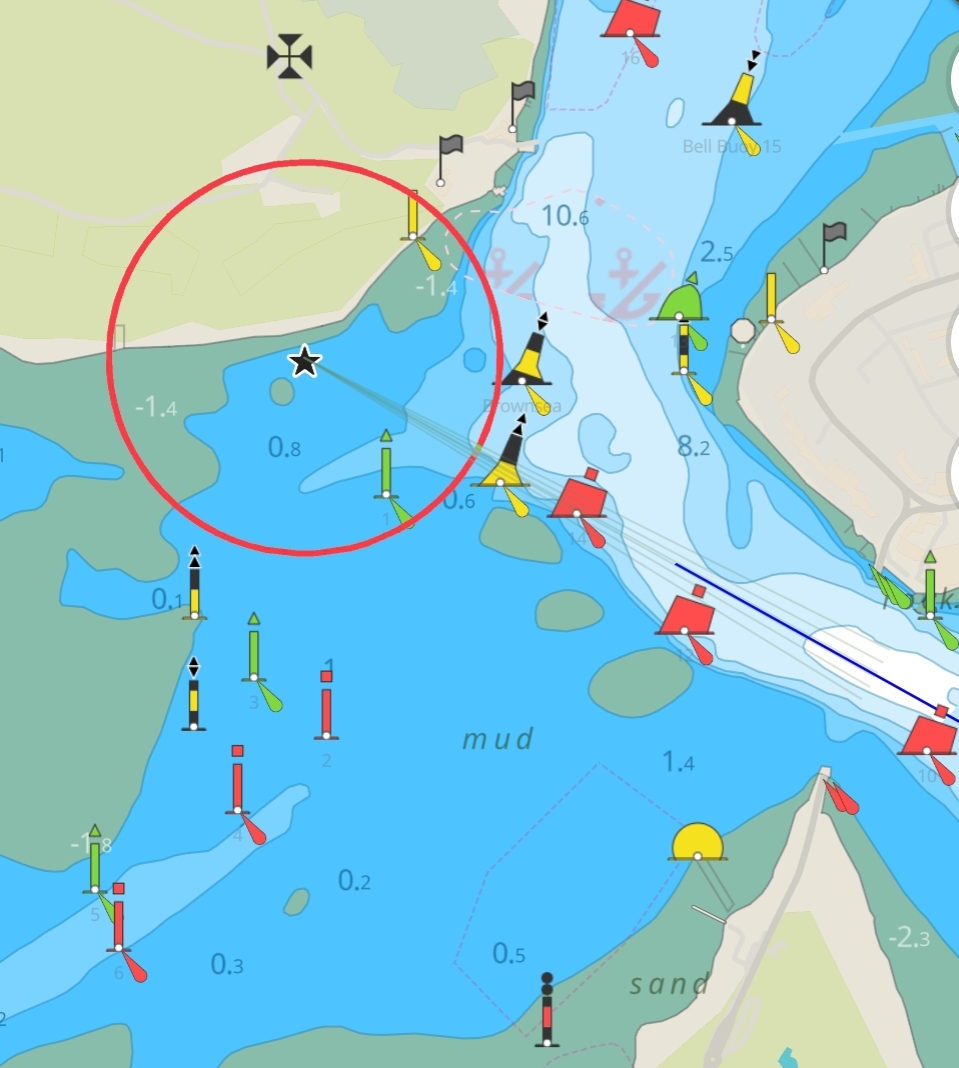
If you are out on the water and need a quick check you may choose to use an chart app on your phone to identify marks. An example from the Savvy Navvy app shows the colours below. Bear in mind no apps should be your sole means of communication. They are great as back up but are subject to limitations which you must understand. That said, they can be great backups.
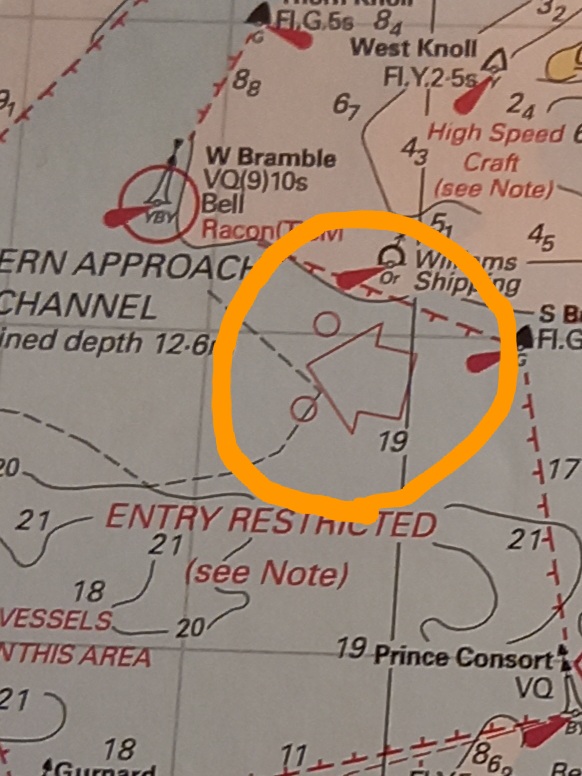
Below is a picture taken from an Imray chart showing the symbol which indicates the direction of buoyage where it is not obvious. Locally you will find it on Solent Charts:
Learning more:
We hope this blog has been useful as a refresher or to prompt you to undertake formal training. It cannot cover all the topics usually covered on a course. Please contact us to contact us to discuss training options. For theory learning take a look at the Essential Navigation, Day Skipper or Yachtmaster theory. If you prefer to put it into context on the water why not book some bespoke training or a Powerboat Level 2 Course? Contact us to chat through options and ideas.
Please do drop us some feedback to let us know what you’d like us to cover in future blogs.
Let us know if you found this Blog on Buoyage and Navigation marks useful?